All are aware of the natural writing experience of the Samsung S Pen, but it is more than just a stylus. It is a remote control for controlling the device from a particular distance by using radio signals, a paintbrush to unleash artistic talents or delve right into the world or drawing, a mouse to preview the links and messages or hover over the edge of the screen to scroll.
In this post, we will mention remote actions which are named Air Actions and allow the user to open apps, take screenshots and play/pause music like waving a magic wand without a need for touching the screen and the unique features and apps of S Pen that are categorized in Air Commands which allow the users to access particular apps and features with ease from a collapsible menu.
Air Actions
Basically, there is a built-in system within the hardware of S Pens which allow the Samsung Members to control the device from a distance without even touching the screen with the help of electrical or radio signals. Nevertheless, its trigger range is not limitless, mobile devices can only detect the actions within the 10 m (32 ft) trigger area.
Samsung provides Air Actions to particular high-budget phones and tablets. Accordingly, you may have an S Pen that comes with the device itself but actions might not be available and require an S Pen Pro which can be exemplified by Samsung Galaxy S6 Lite.
Apart from that, Air Actions are available on Samsung Galaxy Note Series and S21/22/23 Ultra but available Air Actions vary according to the device. For example, "Anywhere Actions" which will be mentioned below, offers "Gestures" only to Galaxy Note 20/Note 20 Ultra, Galaxy S21/22/23 Ultra and Tab S7/8. For that reason, it is not available on other Note Series such as Note 9/10 and so forth.
Anywhere Actions
Under Anywhere Actions, Air Actions can be chosen to be done by pressing and holding the S Pen's button or gesture.
Each time you press and hold the S Pen button, the selected action will be opened without considering whether there is an app in the foreground or not which is why they are called "Anywhere Actions". For instance, even if Samsung Internet is opened on the screen, the Camera or any other selected app will be opened when the S Pen button is pressed and held.
Along the same line, when S Pen is pressed and moved in a particular pattern, the predetermined action will be performed.
How to Perform Anywhere Actions
- Head into Settings > Advanced Features > S Pen > Air Actions.
- Do not forget to tap on "Air Actions" to see the detailed menu.
- Under "Anywhere Actions", there are the "Press and Hold Pen Button" and "Gestures" headings and the default app selected below it.
- Tap "Press and Hold Pen Button" to see the all options.
- Select the option that you believe is the most relevant to your needs.
- It might be going back home (Navigation) or opening a system or third-party app (Suggested and All Apps).
- Furthermore, get familiar with the Gestures:
- Move S Pen left and back (↪) to go back,
- Move it up and down (↷) to go to the home screen,
- Move it right and back (↩) to go to the recently opened app,
- Move it down and up (↺) to activate "Smart Select" to take a screenshot, and
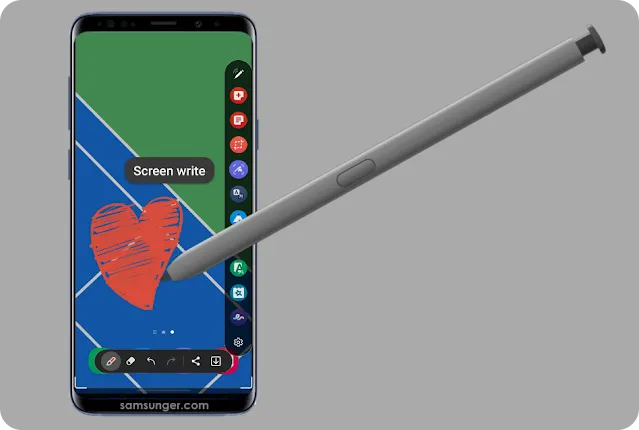
- Shake it (⇝) to open "Screen Write" to both take a screenshot and write or draw on it.
We put a special emphasis on the foreground apps because some individual apps have their own air actions to be implemented when the button is pressed once, twice or S Pen is moved in a particular hand gesture.
App Actions
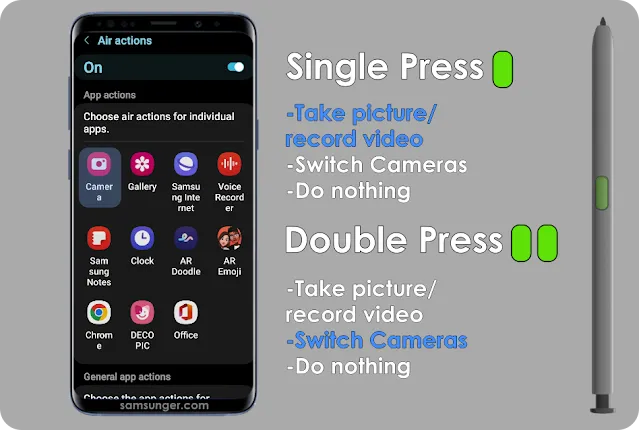
App Actions is another essential part of the "Air Actions" menu because it allows users to select some actions to apply for individual apps when it is single-pressed, double-pressed or moved in a particular pattern.
All the apps are not demonstrated under the heading but the actual number is close to the shown ones and it usually varies according to the model of the Samsung device. Even though some actions are predetermined, they can still be changed.
How to Set App Actions
- Head into Settings > Advanced Features > S Pen > Air Actions.
- Do not forget to tap on "Air Actions" to see the detailed menu.
- Find "App Actions".
- More or less the apps that are compatible with Air Actions are the shown ones but the real number varies according to the Samsung device's model and the compatibility of third-party apps.
- For the sake of example, they are Camera, Gallery, Samsung Internet, Voice Recorder, Samsung Notes, Clock, AR Doodle, AR Emoji, Google Chrome, Deco Pic (AR Zone) and Microsoft Office on Samsung Galaxy Note 10 Lite.
- Select the app to change the air actions.
- Let's say it is "Camera".
- Tap on "Camera".
- Tap on the text next to "Single Press" and do the same for "Double Press".
- Select the action like "Take a picture/record video" or "Switch Cameras".
- Apply the same for others.
- Tap "Gestures".
- Select the action like "↑" for "Switch Cameras", "→" for "Next Mode", "←" for "Previous Mode" and so forth.
- Apply it to all other system apps.
All App Actions for System Apps by Single and Double Press
Apart from the "Camera" app, here are the all apps and options they offer for single and double press:
|
App |
Single Press ◎ |
Double Press ◎◎ |
|
Camera |
-Take picture/record video -Switch cameras -Do nothing |
-Take picture/record video -Switch cameras -Do nothing |
|
Gallery |
-Next Item -Previous Item -Show/hide related content -Do nothing |
-Next Item -Previous Item -Show/hide related content -Do nothing |
|
Samsung Internet |
-Back -Forward -Scroll down -Scroll up -Refresh page -Previous tab -Next tab -Do nothing |
-Back -Forward -Scroll down -Scroll up -Refresh page -Previous tab -Next tab -Do nothing |
|
Voice Recorder |
-Record/pause -Do nothing |
-Record/pause -Do nothing |
|
Samsung Notes |
-Next favourite pen -Previous favourite pen -Previous page -Next page -Redo -Undo -Zoom in -Zoom out -Eraser mode -Do nothing |
-Next favourite pen -Previous favourite pen -Previous page -Next page -Redo -Undo -Zoom in -Zoom out -Eraser mode -Do nothing |
|
Clock |
-Start stopwatch/mark lap -Do nothing |
⊖ |
|
AR Doodle |
-Record video -Switch cameras -Do nothing |
-Record video -Switch cameras -Do nothing |
|
AR Emoji |
-Take picture -Switch cameras -Do nothing |
-Take picture -Switch cameras -Do nothing |
|
Google Chrome |
-Back -Forward -Scroll down -Scroll up -Do nothing |
-Back -Forward -Scroll down -Scroll up -Do nothing |
|
Deco Pic |
-Take picture -Switch cameras -Do nothing |
-Take picture -Switch cameras -Do nothing |
|
Office |
-Next slide -Previous slide -Do nothing |
-Next slide -Previous slide -Do nothing |
|
Media |
-Play/pause -Play previous track -Play next track -Volume up -Volume down -Do nothing |
-Play/pause -Play previous track -Play next track -Volume up -Volume down -Do nothing |
What about just pressing the button? In this instance, there is a particular prerequisite for the product to detect the action which is basically "proximity". Nothing happens when the button is pressed on the screen until the time S Pen is hovered over the screen and the small blue dot (Air Commands dot or indicator) appears.
When only the closeness and small blue dot conditions are met, the "Air Command" menu is opened.
Air Commands
Unlike Air Actions, Air Commands necessitates touch on the screen and provides unique S Pen features and a quick access option to your favourite system or third-party apps on your Samsung device.
The menu pops up when the S Pen is removed but it can still be accessible after that. For this, just hover over the screen with S Pen and press its button once or hover over the screen again and touch on "Air Command Icon".
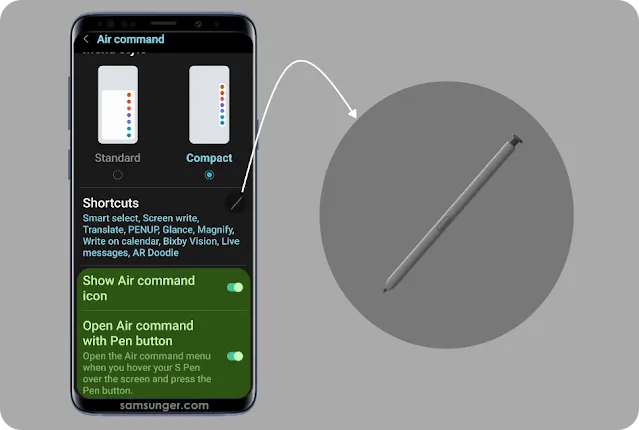
However, the "Show Air Command Icon" and "Open Air Command with Pen Button" settings should be enabled. Although they are turned on as the system default, it had better to check:
- Go to Settings > Advanced Features > S Pen > Air Command.
- Toggle on, if they are not, both "Show Air Command Icon" and "Open Air Command with Pen Button".
As it is aforementioned, it offers various features that make performing particular actions easier such as writing on the screen or calendar, creating live messages, taking notes and etc.
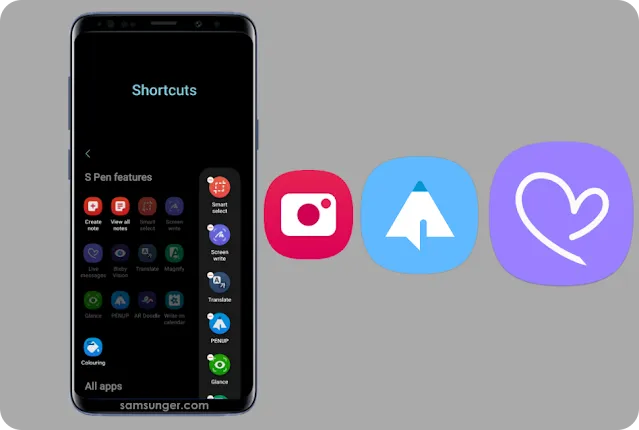
Up to 10 shortcuts, every single system, third-party apps and features specific to S Pen can be dragged to the menu, here is how:
- Go to Settings > Advanced Features > S Pen > Air Command.
- Touch "Shortcuts".
- Touch "Remove ⊖" for the ones you do not want to see on "Air Command" and touch the ones you want to see from "S Pen Features" or "All Apps".
- Note that some system and third-party app shortcuts only open the app itself and do not offer something special like unique features within the app for S Pen.
Air Commands Shortcuts
Create Note
It directly creates a Samsung Notes file on a pop-up floating page and it is saved to the Samsung Notes as a new document without a manual action. Thus, the document can be edited in a detailed way after writing which is done quickly and carelessly.
The hard part of it might be how to close the window if you are not familiar with the floating page of Samsung. However, it is easy as 1-2-3.
There is a long dash (Quick Options) at the top centre of the page, it is the place to be tapped or touched. After that, the only thing to do is tap "Close ✖".
Alternatively, touch and hold the same dash until you see the "Remove" at the bottom of the screen and drag the page towards it.
View All Notes
You might be surprised but it only demonstrates all the notes saved on your Samsung Notes app and nothing else. The rest is up to you.
It might be a good option for the ones who use it daily or even hourly basis.
Smart Select
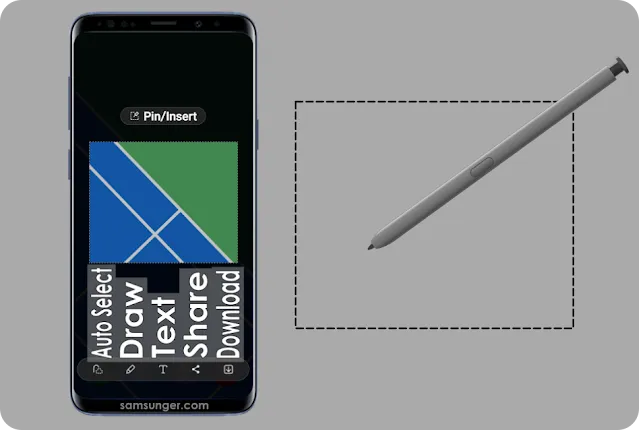
It opens a mini toolbar at the bottom of the screen which consists of rectangle, lasso, and oval options to select the screen, an option to create GIFs and a useful feature named "Pin/Insert".
It goes without saying, rectangle and oval selection either enlarge or reduce in a particular geometrical shape but you might not be familiar with "lasso".
It might be classified as the "free" selection and as its literal meaning, it places a ring to the starting point of the rope and allows the user to do any kind of pattern as long as there is no gap in the selection, in other words, the selection form should be a closed loop. After all, an error message appears on the screen if the selection form does not meet the criterion.
After the selection, a drawing or text can be added to the screenshot.
Additionally, it might be shared or saved to the Gallery.
The last thing that can be done is "Auto Select" which automatically detects the possible item on the screen to be extracted from the background. In other words, it forms the transparent version.
However, when it is a complicated image, it does not select as expected. In such cases, it can be adjusted by either adding or removing particular areas before tapping "Done" which saves the selection.
Animation (or GIF) records a selected area on the screen for up to 15 seconds. Before starting the recording, it is a good idea to select the quality in case there is not enough space on your device to store high-quality graphics interchange formats. Exactly what is said in the aforementioned sentence, the quality options are High and Standard Quality.
Plus, adjust the frame according to your needs because it is pinned and cannot be moved during the recording. During the recording, file size is shown in MBs.
After the recording, you may draw something special on it, share it with Quick Share or on your social media account, save it to the Gallery to be used in the time to come or pin it to the screen to be used somewhere else.
Speaking of the pin and insert, we had better explain the last option of Smart Select which is Pin/Insert.
Like any other option, it asks for a determined area on the screen and touch on "Pin/Insert" which pins the selected area to the top right corner of the screen and it stays there until it is closed or saved to the Gallery manually.
The real area of usage might be not going from one page to another consistently and benefiting from a pinned screenshot while taking notes or copying and pasting a picture format directly from an app/website to another app like Samsung Notes.
Explaining in detail, let's assume that you are taking notes on Samsung Notes and there is a need for a particular picture from a website or app. In such cases, the pinned screenshot can be easily inserted into the document. What needed to be done is simple:
- Tap "Smart Select" on the Air Commands.
- Select "Pin/Insert" and the desired area to be pinned to the top right corner of the screen respectively.
- Open Samsung Notes or any other app you want to insert the pinned item.
- Touch and hold it and drag it to the relevant place on the app to insert.
- Finally, adjust it based on your needs. It is that simple!
By the time there is an existing pinned image, a new one cannot be created which is why the existing one either be saved to the Gallery or closed.
In order to do that, touch on the pinned image once and either close it or download it to the Gallery.
Minimizing is not a convenient solution, it only makes the pinned item smaller and not hiding it from the view.
Screen Write
It takes a screenshot of the current screen and opens the window to write or draw. Before sharing or saving it, it might be resized with the help of resize handles/grips which are represented by diagonal arrows or L-shaped symbols on Samsung phones or tablets.
AR Doodle
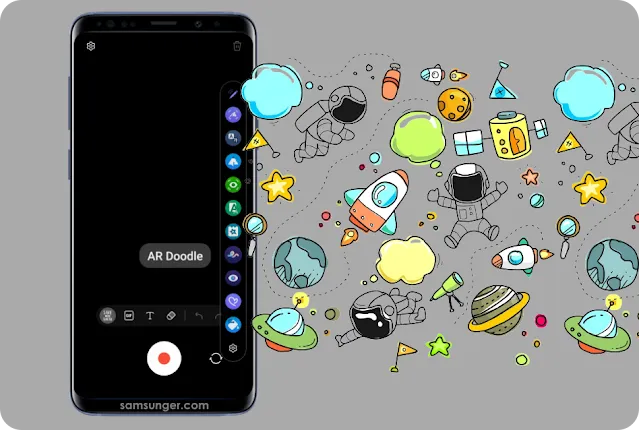
It is a section of AR Zone that enables users to add GIFs, messages, and drawings on the screen while they brainstorm or when they're bored. You may utilize AR Doodle with both the front and back cameras.
Pens, GIFs, texts, erasers, undo, and redo buttons are all included in the toolbar.
Five distinct pens are available under the Pens category: a 3D pen, a pattern pen, a neon pen, a conventional pen, and a stamp pen.
There are several GIF categories listed under the GIFs category, including Trending, Happy, Thumbs Up, Thanks, and many others. Additionally, using the search box, it is possible to look for different types of GIFs.
Alignment, font style, colour, and background may all be changed under the Texts category. Like any other software, there are three alignment options: left, centre, and right. The available font styles are thin, bold, outline, typewriter, gradient, and default. The backdrop can be any of dozens of different colours.
Eraser, Undo, and Redo are ultimately used to arrange the doodle.
Users of AR Doodle have the option to record or snap a photo of their doodle, just as with any other AR Zone application. The strange thing is that taking a photo requires first starting the recording, so hit the "Recording" button to do that, then while the recording is still going on, tap the "Camera" button next to the "Pause and Stop" buttons to snap a picture.
Translate
It is a life-saver for the ones who are learning a new language because as its name suggests, it directly translates a text or sentence from a source language to the target language. Under existing circumstances and the current day, Samsung offers 39 source and 108 target languages.
Needless to say, it requires either mobile data or a Wi-Fi connection.
It is converted and translated by Google Translate. Even though Google Translate made a good time in enhancing its overall user experience and accuracy over the course of many years, it is not perfect or close to perfect in some languages when they are compared with English. That's why the experience varies according to how advanced Google's language data and algorithms are.
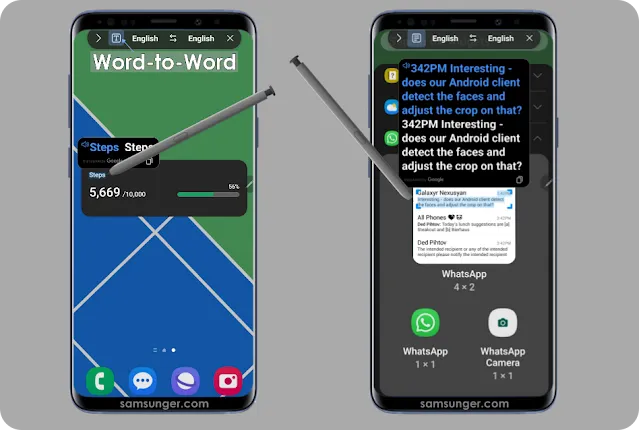
Within the Translate toolbar, the source and target language can be selected. Apart from that, translation options can be selected as well which are "Word-by-Word Translation" and "Complete Sentence Translation".
The "T" symbol within the square represents "Word-by-Word Translation" and "☰" within the square represents "Complete Sentence Translation".
How to Translate with S Pen
- Press once S Pen button to open Air Command and select "Translate".
- If you cannot see it, go to Settings > Advanced Features > S Pen > Air Commands > Shortcuts and add "Translate".
- Select the source and target language by tapping on the languages in the toolbar.
- Additionally, select the translation option: "Word-by-Word" or "Complete Sentence" translation which is next to the source language in a square.
- Just tap on the symbol in the square to change it.
- Hover over the text and wait for it to be converted.
- Google generally gives the commonly used meaning in "Word-by-Word" translation. In order to see all the meanings, tap on the result which will redirect you to the website of Google Translate.
- There is no such problem in "Complete Sentence" translation, but its own unique problem which is accuracy. Keep always in mind that, the accuracy might not be sufficient in all languages.
PENUP and Colouring
Once it is touched, it immediately opens the PENUP app which is an official Samsung application that is preinstalled on Note Series and other models compatible with S Pen.
It is like a universe for the ones who draw professionally or are interested in drawing amateurishly.
Colouring is rich with sketches or simple and quickly-made drawings and all that remains is making it detailed by painting.
Live Drawing might be the perfect opportunity for the ones who think of getting down to drawing. It is like a tutorial but something better. A video clip is played on the screen to demonstrate each part of an artwork and in particular parts, it is paused to let the user draw on top of a video. Even the type of pen, its thickness and colour are selected automatically without the control of the user. The speed of the video can be speeded up to 8X and it is quite possible to play, pause and rewind.
Every fortnight, challenges are held covering a particular object like the forest, thunderbolt, turtle, rose and so on.
All the colouring, live drawing or other kinds of practices in PENUP can be shared with others as long as you sign in to your Samsung Account or Google, Facebook or Twitter.
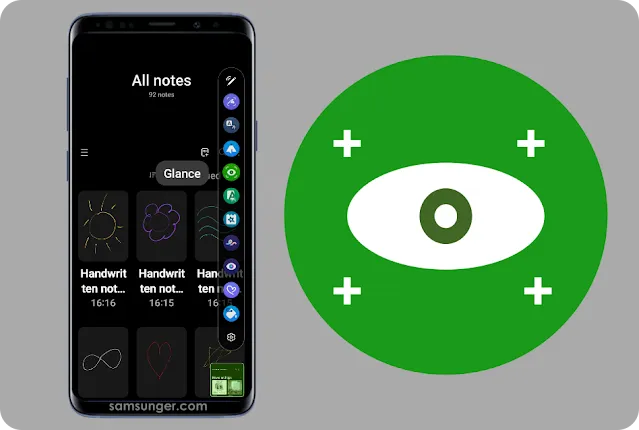
Glance
It reduces the current screen in size and pins it to the bottom right corner of the screen. This makes it easy to switch between the apps while doing something that requires both pages to be reached at the same time.
In order to see the app in full screen, just hover over the thumbnail, miniscreen, miniature window, shrink window or you name it with the S Pen.
Either use navigation buttons/gestures or move the S Pen away from the screen to reduce it to the shrink window.
When you are done with it, touch, hold and drag the thumbnail to the "Remove" icon.
Plus, note that some apps do not support "Glance" like Camera.
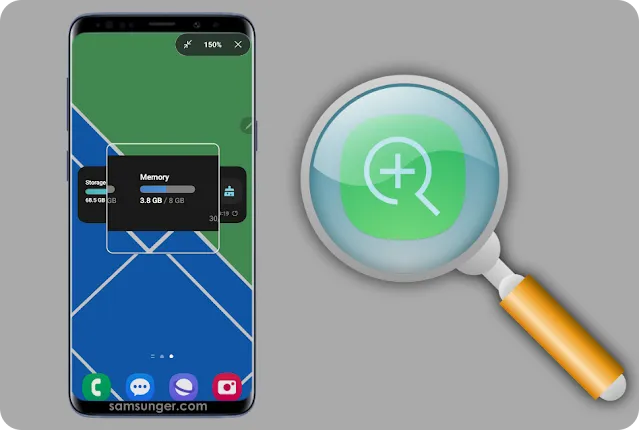
Magnify
It turns your S Pen into a magnifier which makes it easy to see every pixel on the screen larger than it is. Zoom levels range from 150% to 300%, increasing by 50%.
When the "Magnifier" is touched, a magnifier window appears on the screen which occupies nearly 1/5 of the screen in its original form. However, with the resizer, it is possible to make the magnifier window bigger or smaller.
The magnifier function may be a helpful accessibility tool for those with low vision or other visual impairments to make the material on the screen easier to read.
In addition to that, it might be useful when you encounter tiny texts on a website or identify small pictures on an app.
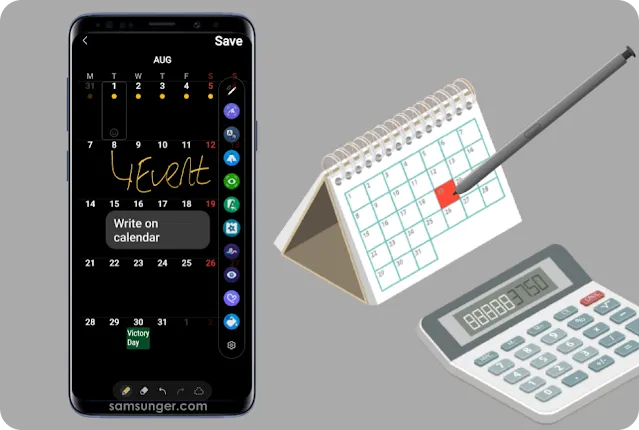
Write on Calendar
It opens the Calendar app and allows the user to take notes directly on top of the app rather than on a screenshot.
- Open Air Command Menu and tap "Write on Calendar".
- If you cannot see it on Air Command Menu, add it from Settings > Advanced Features > S Pen > Air Command > Shortcuts.
- Select the pen mode such as pen type and color.
- Take a note or draw something on it and do not forget to tap "Save" at the end.
Each time you open the Calendar app, the note will appear on the month it is saved. In order to edit or delete the writing, either touch "Write on Calendar" again from Air Command or go to Calendar app and tap the "Write" icon which has a pen symbol.
You may use "Eraser" from the toolbar or press and hold the S Pen button to turn it into an eraser.
Once again, bear in mind tapping "Save" ultimately.
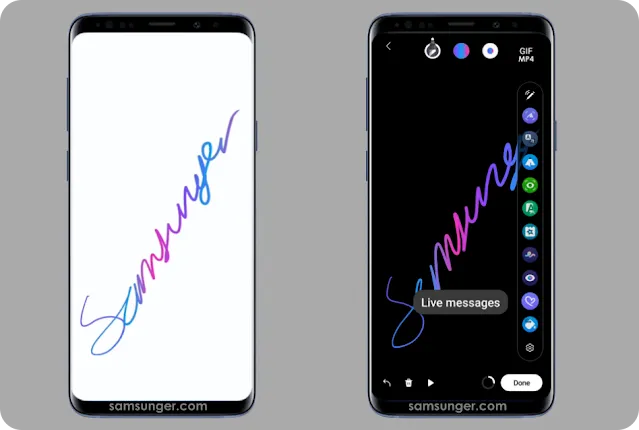
Live Messages
After you allow the required permissions, it opens the Live Messages app where you write your message on a background.
The background can be selected by swiping left and right and might be a collection which comes to mean all the pre-existing ones you or Samsung have created before, an existing picture or a video from the Gallery, a new picture or video taken with the Camera, and just a colour or a combination of colours.
From the top of the screen, pen effects, colours and thickness can be selected.
It is not possible to write a long SMS or MMS message with this feature because it is tracked with a progress bar which is placed at the bottom right of the app next to the "Done" button and only allows for handwriting that corresponds to 42-45 characters in a text. As and when the progress bar is completed, a message will appear above the progress bar that says "Message Full" and from that stage forth there is no chance to add additional handwriting.
The format of the live message might be changed as well but it only has two options which are MP4 (video format) and GIF.
You may say why MP4? The reason behind this is the user's preferences and making it more compatible with videos with sound. That is to say, preventing any sound problem if the users choose a video with sound to write a live message on it.
When it is all over, tap "Done" to save the message to the Gallery. On that, you may do whatever you want to do with it like setting it as a wallpaper for the lock screen or sharing it with your friends on social media.
Bixby Vision
Bixby Vision might be classified as the Google Lens version of Samsung. Under normal conditions which is to say opening it through Camera or the app on the home or apps screen, the Camera is pointed at an object or a text to do particular things with it such as translation, object identifying, extracting text from an image and so forth. However, this is the S Pen version of it and things are slightly different.
Even though the Bixby Vision app is more advanced when it is compared with the S Pen version, it still provides the majority of the features except for accessibility modes.
It generally automatically detects and scans the area where the user intends to do but sometimes it sometimes shows a smaller scanning area than expected. When this is the case, use the points at each corner of the selected area to enlarge or reduce them.
How to Use the S-Pen Version of Bixby Vision
- Tap "Bixby Vision" on Air Command.
- Hover over an object or a text and enlarge or reduce the automatically selected area if it is needed.
- After that, two icons will appear at the bottom of the selected area. One of them has a picture symbol in it and the other one has a "T" symbol.
- The icon with "picture symbol" corresponds to "Discover" and the icon with "T symbol" corresponds to "Text".
- "Discover" basically scans the selected area and demonstrates similar or exact pictures on Pinterest which can be classified as a search engine for images.
- "Text" detects whether there is text or handwriting on the image or not and if there is, extracts it from the image and lets the user do something with it:
- Copy: As the name indicates, it copies the text or handwriting to the clipboard and allows the user to paste it somewhere else.
- Translate: It automatically detects the source language and translates it into a selected target language by Google Translate.
- Search: It searches the selected text on the Internet, usually in Google Chrome, and demonstrates the search results on the search engine.
- Always keep in mind that the accuracy of handwriting extracting might not be as good as the text.
Conclusion
Air Actions are the complete control of particular system apps without even touching the screen and Air Commands are the S-Pen specific features to increase the overall user experience. It follows from this that S Pen is not a stylus but it is a remote control, a paintbrush, and a mouse at the same time. The exact number of shortcuts available for air actions completely depends on the Samsung model, some offer more and others less.
If you have any further questions concerning Air Actions and Commands on Samsung, kindly post a comment below. If we are able to understand the topic of your enquiry, we may be able to supply some of the answers. Don't worry; in other cases, we can give you access to particular articles written by members of the community that you can read and use to examine the problem you're attempting to understand.











Comments
Post a Comment